Cheesy Garlic Chicken Wraps
A perfect blend of juicy chicken, gooey cheese, and aromatic garlic wrapped in a warm tortilla. These Cheesy Garlic Chicken Wraps are ready in under 30 minutes and make an ideal quick dinner or lunch option for busy weeknights.
Easy Cheesy Garlic Chicken Wraps Recipe
There’s something irresistibly comforting about biting into a warm, Cheesy Garlic Chicken Wrap that’s fresh off the skillet. The combination of tender, seasoned chicken, melted cheese, and the aromatic punch of garlic creates a flavor profile that’s both familiar and exciting. These homemade Cheesy Garlic Chicken Wraps have become a staple in my household, especially during those busy weeknights when we need something substantial but quick.
While wraps are enjoyed year-round, I find myself especially drawn to this recipe during fall and winter months when the warming spices and melty cheese provide that cozy comfort food feeling we all crave. It’s also a fantastic way to use leftover rotisserie chicken, making it both economical and practical.
THIS RECIPE:
- Ready in under 30 minutes from start to finish
- Uses simple ingredients you likely already have
- Customizable with your favorite cheese varieties and add-ins
- Perfect for meal prep – make ahead and reheat as needed
| Recipe Details | Information |
|---|---|
| Prep Time | 10 minutes |
| Cook Time | 15 minutes |
| Total Time | 25 minutes |
| Servings | 4 wraps |
| Calories | Approximately 450 per wrap |
These Cheesy Garlic Chicken Wraps strike the perfect balance between quick convenience and homemade satisfaction. The beauty of this recipe lies in its simplicity – with just a handful of ingredients, you can create a restaurant-quality meal that everyone will love. The melted cheese combined with the garlic-infused chicken creates an irresistible flavor combination that will have you making these wraps on repeat.
Ingredients for Cheesy Garlic Chicken Wraps
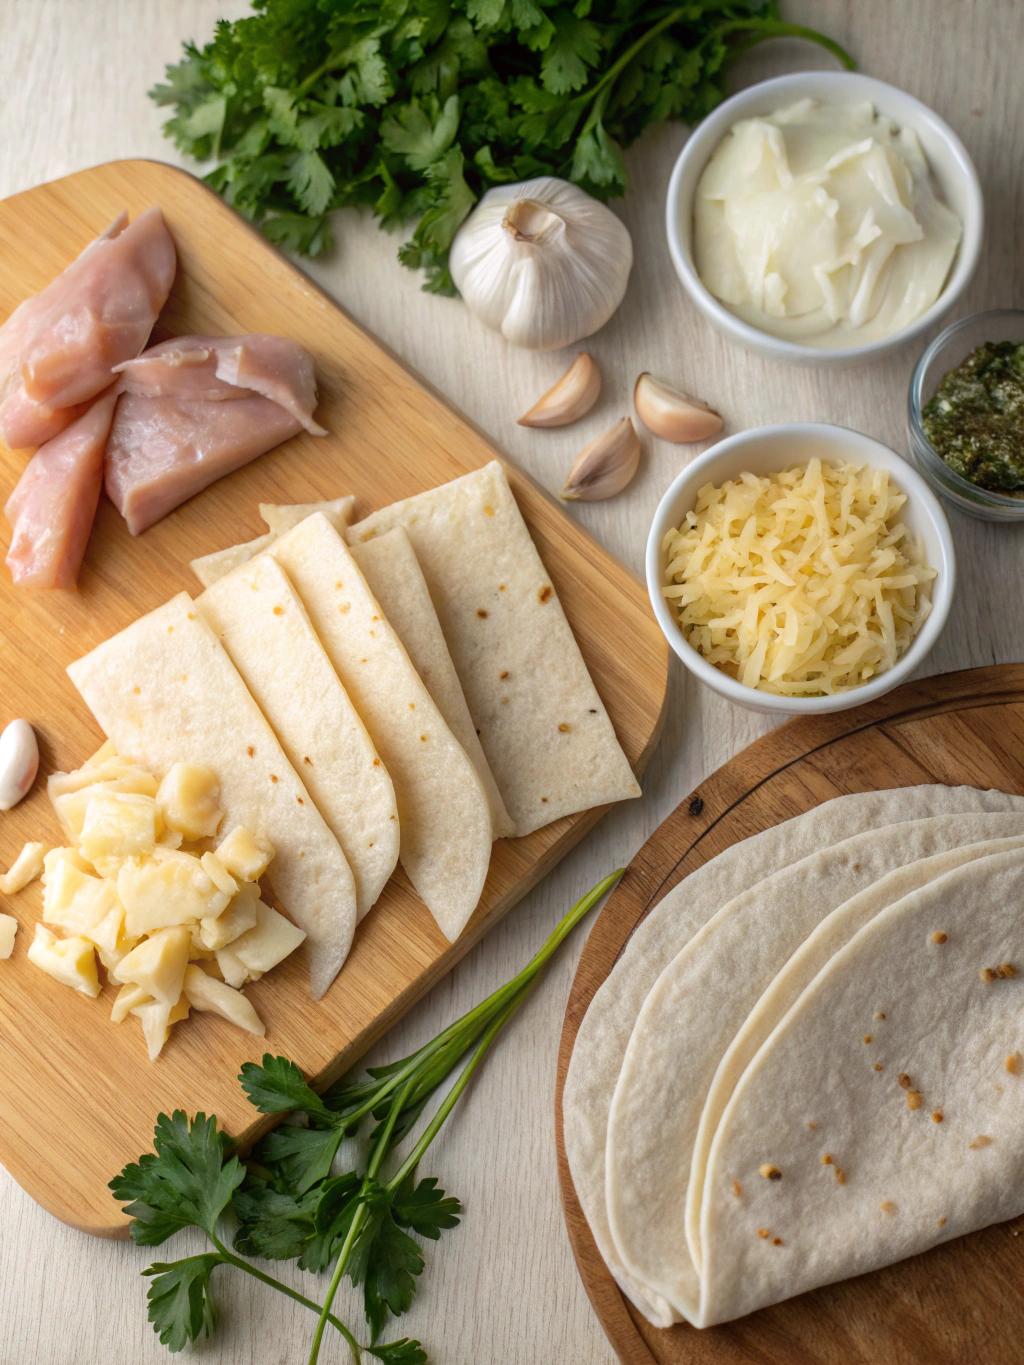
The quality of your ingredients makes all the difference when preparing Cheesy Garlic Chicken Wraps. Since this recipe has relatively few components, each one plays an important role in the final flavor profile. Whenever possible, opt for fresh ingredients, particularly when it comes to the garlic and herbs.
For the Chicken Filling:
- 2 cups cooked chicken, shredded or diced (rotisserie chicken works perfectly)
- 3 cloves garlic, minced
- 2 tablespoons olive oil
- 1 teaspoon Italian seasoning
- 1/2 teaspoon paprika
- 1/4 teaspoon red pepper flakes (optional)
- Salt and pepper to taste
For the Wraps:
- 4 large flour tortillas (10-inch size)
- 2 cups shredded cheese blend (mozzarella and cheddar work well)
- 1/4 cup fresh parsley or cilantro, chopped
- 2 tablespoons butter, for toasting wraps
Optional Add-ins:
- 1/2 cup diced red bell pepper
- 1/4 cup diced red onion
- 1 small avocado, sliced
- 2 tablespoons ranch dressing or sour cream
| Ingredient Category | Recommended Quantity | Quality Tips |
|---|---|---|
| Chicken | 2 cups | Rotisserie chicken offers the best flavor, but any cooked chicken works. Ensure it’s well-seasoned. |
| Cheese | 2 cups | Freshly grated cheese melts better than pre-shredded varieties which often contain anti-caking agents. |
| Tortillas | 4 large (10-inch) | Look for pliable tortillas without tears. Slightly warm them before assembly for better folding. |
| Garlic | 3 cloves | Fresh garlic provides significantly better flavor than jarred options. Choose firm bulbs with tight skin. |
Pro tip: When selecting chicken, rotisserie offers the most flavor with the least effort, but you can also use grilled chicken breasts or thighs cooked specifically for this recipe. If using the latter, consider marinating the chicken in garlic, olive oil, and herbs for at least 30 minutes before cooking to enhance the flavor.
How to Make Cheesy Garlic Chicken Wraps
Creating perfect Cheesy Garlic Chicken Wraps is all about layering flavors and ensuring every component is seasoned well. The process is simple but requires attention to detail, especially when it comes to heating the wrapped tortillas to achieve that perfect golden exterior while ensuring the cheese melts completely.
Step-by-Step Instructions:
Prepare the chicken mixture:
- In a large skillet, heat olive oil over medium heat.
- Add minced garlic and sauté for 30-45 seconds until fragrant but not browned.
- Add shredded chicken, Italian seasoning, paprika, red pepper flakes (if using), salt, and pepper.
- Stir to combine and heat through for about 3-4 minutes. Remove from heat.
Assemble the wraps:
- Lay a tortilla flat on a clean work surface.
- Sprinkle about 1/4 cup of shredded cheese in the center of the tortilla.
- Top with approximately 1/2 cup of the garlic chicken mixture, spreading it in a rectangular shape in the center.
- Add any optional add-ins like bell peppers or onions if desired.
- Sprinkle another 1/4 cup of cheese on top of the chicken.
- Scatter some fresh herbs over the cheese.
Fold the wraps:
- Fold in the sides of the tortilla toward the center.
- Starting from the bottom, tightly roll the tortilla up and over the filling, continuing to roll until completely wrapped.
- Place seam-side down and repeat with remaining tortillas.
Cook the wraps:
- In a clean skillet or griddle, melt 1/2 tablespoon of butter over medium heat.
- Place 1-2 wraps seam-side down on the skillet.
- Cook for 2-3 minutes until golden brown and crisp.
- Add another 1/2 tablespoon of butter to the skillet, flip the wraps, and cook for another 2-3 minutes until the other side is golden and the cheese inside has melted.
- Repeat with any remaining wraps.
Rest before serving:
- Allow the wraps to rest for 1-2 minutes before cutting in half diagonally.
- This brief resting period helps the melted cheese set slightly, making the wraps easier to handle and eat.
Pro tip: For extra crispy wraps, you can brush the outside of the tortilla with a little olive oil or melted butter before placing it on the skillet. This ensures even browning and adds a subtle richness to the exterior.
Tips for Making Cheesy Garlic Chicken Wraps
Mastering homemade Cheesy Garlic Chicken Wraps comes down to understanding a few key techniques that elevate them from good to great. After making these countless times, I’ve discovered several tricks that make a significant difference.
- Don’t overstuff your wraps – it’s tempting to add more filling, but this often leads to tearing and difficulty in cooking
- Toast the wraps in butter rather than oil for a richer flavor and better browning
- Allow the wrapped tortillas to rest seam-side down for a minute before cooking to help them stay sealed
- Grate your own cheese instead of using pre-packaged shredded cheese for better melting
| Technique | Recommendation |
|---|---|
| Tortilla Selection | Slightly warm tortillas before filling to make them more pliable and less likely to tear |
| Cheese Placement | Place cheese both under and over the chicken filling to create a “glue” that holds ingredients together |
| Cooking Temperature | Medium heat is ideal – too high and your tortilla burns before cheese melts; too low and it becomes soggy |
| Sealing Method | If wraps won’t stay closed, secure with a toothpick before cooking |
One critical step often overlooked is managing moisture. If your chicken mixture is too wet, it can make the tortillas soggy. After cooking the chicken with garlic and spices, allow any excess moisture to evaporate completely. Similarly, if adding vegetables like bell peppers or onions, sauté them briefly before adding to release some of their water content.
Pro tip: For an extra flavor boost, mix a teaspoon of garlic powder directly into the melted butter before toasting the wraps. This infuses the exterior with additional garlic flavor that complements the filling beautifully.
Make-Ahead Instructions
Cheesy Garlic Chicken Wraps are perfect for meal prep and can be prepared in various stages ahead of time to streamline your cooking process when you’re ready to eat.
The chicken filling can be prepared up to 3 days in advance and stored in an airtight container in the refrigerator. This actually allows the flavors to develop even more, resulting in a more flavorful wrap. Just reheat the filling briefly in a skillet or microwave before assembling your wraps.
You can also completely assemble the uncooked wraps up to 24 hours before cooking. Simply:
- Follow all assembly instructions
- Wrap each assembled wrap tightly in plastic wrap
- Store in the refrigerator on a flat surface
- When ready to cook, unwrap and proceed with the cooking instructions
For extended storage, consider preparing just the chicken mixture in larger batches:
| Component | Storage Method | Duration |
|---|---|---|
| Garlic Chicken Mixture | Refrigerated in airtight container | 3-4 days |
| Garlic Chicken Mixture | Frozen in freezer-safe container | 2-3 months |
| Assembled Uncooked Wraps | Refrigerated, wrapped individually | 24 hours |
When reheating the pre-made chicken mixture, add a tablespoon of water to the pan and cover briefly to help the chicken retain moisture. Let it come to room temperature for about 15-20 minutes before using it to fill your wraps.
Storing Leftovers
Properly storing leftover Cheesy Garlic Chicken Wraps ensures they remain delicious for future meals while maintaining food safety.
For optimal results, allow cooked wraps to cool completely before storing, but don’t leave them at room temperature for more than 2 hours. Once cooled, wrap each individual wrap tightly in aluminum foil or plastic wrap, then place them in an airtight container or resealable plastic bag.
Refrigerated leftover wraps will maintain their quality for 3-4 days. The key to preserving their texture is proper wrapping – this prevents the tortillas from drying out and becoming tough.
When it’s time to enjoy your leftovers, you have several reheating options:
- Microwave: For a soft wrap, microwave for 1-2 minutes, turning halfway through
- Skillet: For a crispy exterior, reheat in a dry skillet over medium heat for 2-3 minutes per side
- Oven: For the best texture balance, wrap in foil and heat at 350°F for 10-12 minutes
Pro tip: If using the microwave, wrap your Cheesy Garlic Chicken Wrap in a slightly damp paper towel before heating. This creates steam that helps revitalize the tortilla and prevents it from becoming rubbery.
Freezing Cheesy Garlic Chicken Wraps
One of the best features of Cheesy Garlic Chicken Wraps is their freezer-friendliness, making them perfect for batch cooking and future quick meals.
To freeze properly:
- Allow fully cooked wraps to cool completely
- Wrap each individual wrap tightly in aluminum foil
- Place wrapped wraps in a freezer-safe plastic bag or container
- Label with the date and contents
- Freeze flat to maintain shape
Frozen Cheesy Garlic Chicken Wraps will maintain quality for up to 3 months. Beyond this timeframe, they remain safe to eat but may develop freezer burn or texture changes.
When you’re ready to enjoy your frozen wraps, you have two thawing options:
Method 1 – Thaw First:
- Transfer from freezer to refrigerator and thaw overnight
- Reheat using any method described in the Storing Leftovers section
Method 2 – Direct Reheating:
- Unwrap from foil and microwave on 50% power for 2-3 minutes
- For crispy texture, transfer to a skillet and toast for 1-2 minutes per side
To maintain the best quality after freezing, consider slightly undercooking the wraps initially if you know you’ll be freezing them. This prevents overcooking during the reheating process.
Serving Suggestions
Elevate your Cheesy Garlic Chicken Wraps from a simple meal to an impressive spread with these complementary serving ideas.
These flavorful wraps pair beautifully with lighter side dishes that balance their richness:
- Fresh green salad with vinaigrette dressing
- Roasted vegetables like zucchini, bell peppers, or asparagus
- Mexican-style rice or cilantro-lime cauliflower rice
- Tortilla soup for a complete Mexican-inspired meal
For toppings and condiments, consider serving small bowls of:
- Pico de gallo or fresh salsa
- Guacamole or sliced avocado
- Sour cream or Greek yogurt
- Hot sauce for those who enjoy heat
When it comes to presentation, there are several appealing options:
- Slice diagonally and arrange on a platter with fresh herbs scattered on top
- Secure with decorative toothpicks and serve upright in a shallow bowl
- Serve whole with colorful side dishes for a vibrant plate
For beverages, consider these pairings:
- Citrusy iced tea complements the garlic and cheese flavors
- Mexican beer with a lime wedge offers a classic combination
- Sparkling water with lemon for a refreshing non-alcoholic option
- A crisp white wine like Sauvignon Blanc pairs nicely with the chicken and cheese
Cheesy Garlic Chicken Wraps are best enjoyed immediately after cooking, while the tortilla is still crisp and the cheese is perfectly melted. They should be warm but not too hot to handle.
FAQ
Can I use leftover chicken for this recipe?
Absolutely! Leftover rotisserie, grilled, or even roasted chicken works perfectly in Cheesy Garlic Chicken Wraps. The key is ensuring the chicken is well-seasoned and not too dry. If your leftover chicken seems a bit dry, add a tablespoon of chicken broth or a drizzle of olive oil when reheating it with the garlic and spices to restore moisture.
What can I use instead of flour tortillas?
While traditional flour tortillas provide the best texture for these wraps, you have several alternatives. Whole wheat tortillas offer a nuttier flavor and more fiber. Corn tortillas can work but are smaller and more fragile – consider doubling them up. For gluten-free options, look for cassava flour tortillas or large lettuce leaves for a lower-carb version, though the cooking method will need to be adjusted.
How do I prevent my wraps from getting soggy?
Soggy wraps usually result from excess moisture in the filling. Ensure your chicken is relatively dry before mixing with other ingredients. If using vegetables like tomatoes or bell peppers, consider removing seeds and pat them dry. Finally, allow cooked wraps to rest on a wire rack instead of a flat surface for a minute or two after cooking to let steam escape.
Can I make these wraps spicier?
Yes! These wraps can easily be adjusted for heat preference. For mild heat, simply increase the red pepper flakes to 1/2 teaspoon. For medium heat, add 1 diced jalapeño (seeds removed) to the chicken mixture while cooking. For significant spice, include 1-2 teaspoons of your favorite hot sauce in the chicken mixture or add a sprinkle of cayenne pepper to the seasoning blend.
What’s the best cheese to use for the most melty texture?
For optimal meltability, use a combination of cheeses. Mozzarella provides the signature stretch, while medium cheddar adds flavor depth. Monterey Jack also melts beautifully and has a mild flavor that works well. Avoid aged hard cheeses as your only option as they don’t melt as smoothly. Whatever cheese you choose, grating it yourself from a block rather than using pre-shredded varieties will result in a creamier melt since pre-shredded cheeses contain anti-caking agents.


