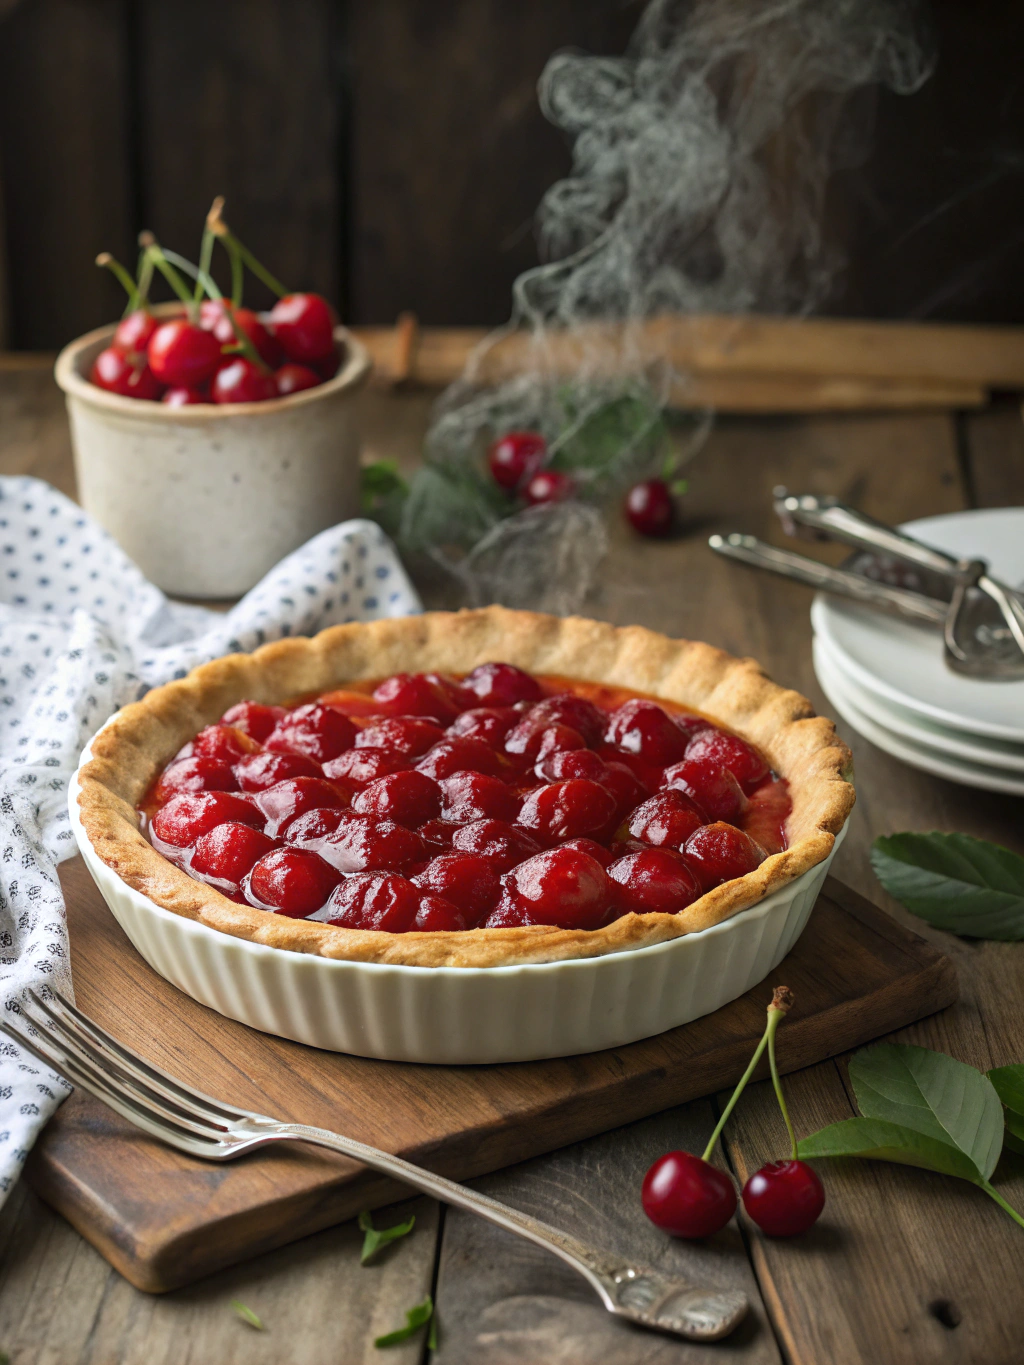
Cherry Pie
A perfectly balanced homemade cherry pie with a flaky, golden crust and a sweet-tart filling that showcases the natural beauty of fresh cherries. This traditional American dessert combines the rich flavor of ripe cherries with warm spices for a comforting treat that’s perfect year-round but especially delightful during summer cherry season.
Easy Cherry Pie Recipe
There’s something truly magical about a homemade cherry pie cooling on the windowsill. This classic dessert has been a staple at American family gatherings for generations, and for good reason. The combination of juicy, tart cherries nestled in a buttery, flaky crust creates a perfect balance of flavors and textures that’s hard to resist.
Cherry pie holds a special place in summer dessert traditions when fresh cherries are at their peak sweetness. However, with this versatile recipe, you can enjoy this iconic treat year-round by using frozen or jarred cherries when fresh ones aren’t available.
THIS RECIPE:
- Features a perfectly balanced sweet-tart cherry filling
- Uses a foolproof, flaky double crust that bakes beautifully every time
- Can be made with fresh, frozen, or jarred cherries for year-round enjoyment
- Requires simple ingredients you likely already have in your pantry
| Recipe Details | Time/Yield |
|---|---|
| Prep Time | 45 minutes |
| Cook Time | 50 minutes |
| Total Time | 1 hour 35 minutes |
| Servings | 8 slices |
| Yield | One 9-inch pie |
This cherry pie recipe strikes the perfect balance between simplicity and impressive results. Even if you’re new to pie-making, the detailed instructions will guide you through creating a dessert that looks and tastes like it came from a professional bakery. The natural sweetness of cherries shines through without being cloying, making this pie suitable for both casual family dinners and special celebrations.
Ingredients for Cherry Pie

The quality of your ingredients directly impacts the final flavor of your cherry pie. While this recipe is forgiving, using the freshest cherries and highest-quality butter will elevate your pie from good to unforgettable. Each component plays a vital role in creating the perfect balance of flavors and textures.
For the Pie Crust:
- 2½ cups all-purpose flour
- 1 teaspoon salt
- 1 tablespoon granulated sugar
- 1 cup cold unsalted butter, cubed (2 sticks)
- ¼ to ½ cup ice-cold water
- 1 egg (for egg wash)
- 1 tablespoon turbinado or granulated sugar (for topping)
For the Cherry Filling:
- 6 cups fresh or frozen pitted cherries (about 2½ pounds)
- ¾ cup granulated sugar (adjust according to cherry sweetness)
- ¼ cup cornstarch
- 1 tablespoon lemon juice
- ¼ teaspoon almond extract
- ¼ teaspoon ground cinnamon
- Pinch of salt
| Ingredient Category | Recommended Quantity | Quality Tips |
|---|---|---|
| Cherries | 6 cups | For fresh cherries, look for firm, plump fruit with glossy skin and green stems. Sour cherries like Montmorency make traditional pies, but sweet varieties like Bing work well with adjusted sugar. |
| Flour | 2½ cups | Use unbleached all-purpose flour for a tender crust. King Arthur or Bob’s Red Mill brands produce reliable results. |
| Butter | 1 cup (2 sticks) | European-style butter with higher fat content (like Kerrygold or Plugra) creates extra flaky layers. Keep it very cold until use. |
| Sugar | ¾ cup for filling, 1 tbsp for crust | Adjust sugar based on cherry sweetness. Taste test before adding the full amount if using particularly sweet cherries. |
How to Make Cherry Pie
Creating a perfect cherry pie requires attention to detail throughout the process, from preparing the crust to achieving the ideal filling consistency. The magic happens when the buttery crust meets the bubbling cherry filling during baking, creating those irresistible juicy pockets and a golden exterior.
Prepare the Pie Crust:
- In a large bowl, whisk together flour, salt, and sugar.
- Add the cold cubed butter to the flour mixture.
- Use a pastry cutter or your fingertips to work the butter into the flour until the mixture resembles coarse crumbs with some pea-sized butter pieces remaining. (These butter pieces create the flakiness in your crust.)
- Sprinkle ice water over the mixture, starting with ¼ cup and adding more as needed, 1 tablespoon at a time.
- Gently toss with a fork until the dough begins to form large clumps.
- Turn dough onto a lightly floured surface and divide into two equal portions.
- Shape each portion into a 1-inch thick disc without overworking the dough.
- Wrap each disc in plastic wrap and refrigerate for at least 1 hour or up to 2 days.
Make the Cherry Filling:
- If using fresh cherries, wash, stem, and pit them using a cherry pitter.
- In a large bowl, combine cherries, sugar, cornstarch, lemon juice, almond extract, cinnamon, and salt.
- Gently toss until all cherries are evenly coated with the sugar mixture.
- Let the mixture sit for 15-20 minutes to allow cherries to release their juices.
Assemble and Bake the Pie:
- Preheat your oven to 425°F (220°C) and place a baking sheet on the lower rack.
- Remove one disc of dough from the refrigerator and let it sit for 5 minutes to slightly soften.
- On a lightly floured surface, roll the dough into a 12-inch circle, about ⅛-inch thick.
- Carefully transfer the dough to a 9-inch pie dish, pressing gently into the corners without stretching.
- Pour the cherry filling into the pie crust, including all the juices.
- Roll out the second disc of dough for the top crust.
- Create a lattice top or use the entire circle, cutting several slits for steam to escape.
- Trim excess dough to a 1-inch overhang, then fold and crimp the edges to seal.
- Brush the top crust with beaten egg and sprinkle with turbinado or granulated sugar.
- Place the pie on the preheated baking sheet and bake at 425°F for 20 minutes.
- Reduce oven temperature to 375°F (190°C) and continue baking for 30-35 minutes, or until the crust is golden brown and the filling is bubbling.
- If the edges brown too quickly, cover them with aluminum foil or a pie shield.
Allow the pie to cool completely for at least 3 hours before slicing. This cooling period is crucial as it allows the filling to set properly, ensuring clean slices rather than a runny filling.
Tips for Making Cherry Pie
Pro tip: The secret to a perfect cherry pie is balancing the sweet and tart flavors. Taste your cherry mixture before filling the pie and adjust sugar accordingly – different cherry varieties and seasonal variations can significantly impact sweetness.
- Keep all ingredients cold until ready to use – warm butter creates a tough, not flaky, crust
- Use a glass pie dish to monitor bottom crust browning
- Bake on the lower oven rack to ensure the bottom crust cooks thoroughly
- Don’t skip the resting time – cutting into a hot pie results in a runny filling
| Technique | Recommendation |
|---|---|
| Crust Texture | For extra flaky crust, freeze butter for 15 minutes before cutting into flour, and use a cheese grater to create perfect butter shreds |
| Thickening | If using particularly juicy cherries, increase cornstarch to ⅓ cup to prevent a soggy bottom |
| Venting | A lattice top not only looks beautiful but provides optimal steam release for a perfect filling consistency |
| Crimping | Dip your fingers in flour before crimping to prevent sticking, and chill the crimped crust for 15 minutes before baking for defined edges |
When working with the pie dough, handle it minimally to prevent the gluten from developing, which would result in a tough crust. The goal is tenderness with distinct flaky layers. If the dough becomes too warm while you’re rolling it out, return it to the refrigerator for 15 minutes before continuing.
Make-Ahead Instructions
One of the beauties of cherry pie is how well different components can be prepared in advance, making it perfect for planning holiday desserts or managing time for special occasions.
The pie dough can be prepared up to 3 days in advance and stored in the refrigerator, wrapped tightly in plastic wrap. For longer storage, freeze the dough discs for up to 3 months. When ready to use, thaw overnight in the refrigerator.
The cherry filling can also be prepared in advance. Mix all filling ingredients together, then store in an airtight container in the refrigerator for up to 2 days. This not only saves time but actually improves flavor as the cherries marinate in the sugar mixture.
For the ultimate convenience, you can assemble the entire pie and freeze it unbaked. Wrap the assembled, unbaked pie tightly in plastic wrap, then in aluminum foil, and freeze for up to 3 months. When ready to bake, do not thaw – simply add an additional 15-20 minutes to the baking time, covering the edges with foil if they brown too quickly.
Storing Leftovers
To maintain the quality of your cherry pie, proper storage is essential. After the pie has completely cooled, loosely cover it with plastic wrap or aluminum foil and store at room temperature for up to 2 days. The slight air circulation helps prevent the crust from becoming soggy.
For longer storage, refrigerate the pie for up to 4-5 days. While refrigeration will extend shelf life, it can slightly change the texture of the crust. To minimize this effect, make sure the pie is completely covered to prevent it from absorbing refrigerator odors.
When serving refrigerated pie, allow it to sit at room temperature for about 30 minutes before serving to restore some of the flavor and texture that might be dulled by cold temperatures.
Individual slices can be stored in airtight containers, placing parchment paper between layers if stacking is necessary.
Freezing Cherry Pie
Cherry pie freezes exceptionally well, making it a perfect make-ahead dessert for busy holiday seasons or unexpected guests.
For freezing a whole baked pie, first allow it to cool completely. Place the entire pie (in its pie plate) on a level surface in your freezer until completely frozen, about 4 hours. Then, wrap the pie tightly with several layers of plastic wrap, followed by aluminum foil or place in a large freezer bag. Label with the date and freeze for up to 4 months.
For individual slices, wrap each piece tightly in plastic wrap followed by aluminum foil. Store wrapped slices in a freezer-safe container to prevent crushing.
When ready to enjoy your frozen cherry pie, thaw a whole pie in the refrigerator overnight. For best results, refresh the pie by heating in a 350°F (175°C) oven for 15-20 minutes. This restores the flakiness of the crust and warms the filling to that just-baked texture. Individual slices can be reheated in the microwave for 30-45 seconds or in a toaster oven for 5-7 minutes.
Serving Suggestions
A slice of homemade cherry pie is delightful on its own but can be elevated with thoughtful accompaniments that complement its sweet-tart flavor profile.
The classic pairing of cherry pie with vanilla ice cream creates a perfect hot-cold contrast, especially when the pie is served slightly warm. Premium vanilla bean ice cream adds rich, creamy notes that balance the brightness of the cherries. For a more sophisticated approach, try serving with lightly sweetened whipped cream infused with a touch of almond extract to echo the flavors in the filling.
For presentation, consider dusting the plate with powdered sugar and adding a few fresh cherries or mint leaves as a garnish. A drizzle of dark chocolate sauce creates both visual appeal and a complementary flavor that enhances the natural richness of the cherries.
Beverage pairings can elevate your cherry pie experience significantly. Coffee’s bitterness perfectly counterbalances the pie’s sweetness, while a dessert wine like port harmonizes with the fruit flavors. For a family-friendly option, serve with cold milk or homemade hot chocolate with a cinnamon stick garnish.
Serve cherry pie at room temperature for the fullest flavor, or slightly warm (about 15 minutes in a 300°F oven) to enhance the aromatic qualities of the filling.
FAQ
Can I use canned cherry pie filling instead of making my own?
While this recipe showcases homemade filling for the best flavor, you can substitute 2 cans (21 oz each) of quality cherry pie filling in a pinch. To improve store-bought filling, stir in ¼ teaspoon almond extract, ½ teaspoon lemon zest, and a pinch of cinnamon before adding to your crust.
How do I prevent a soggy bottom crust?
To ensure a crisp bottom crust, try these techniques: 1) Bake your pie on a preheated baking sheet or pizza stone; 2) Brush the bottom crust with beaten egg white before adding filling; 3) Sprinkle a tablespoon of ground graham crackers or almond flour on the bottom crust to absorb excess moisture; and 4) Make sure your filling isn’t excessively juicy before adding it to the crust.
Can I make this pie with frozen cherries?
Absolutely! Frozen cherries work wonderfully in this recipe. Do not thaw them first, as this would release too much liquid. Add the cherries frozen to your sugar-cornstarch mixture and increase the cornstarch by 1 tablespoon to account for the extra moisture. Extend baking time by about 10 minutes.
What’s the difference between using sweet and sour cherries in pie?
Sour cherries (like Montmorency) provide the traditional tart cherry pie flavor but require more sugar (about ¾-1 cup for this recipe). Sweet cherries (like Bing) create a milder, sweeter pie and need less sugar (about ½-⅔ cup). For the perfect balance, consider using a mix of both types when available, adjusting sugar to taste. Regardless of variety, make sure to pit all cherries thoroughly.
My pie filling is too runny. What did I do wrong?
Runny filling usually results from one of three issues: 1) The pie didn’t bake long enough—make sure you see thick bubbles coming through the vents before removing from the oven; 2) The pie wasn’t cooled completely—cherry pie needs at least 3 hours to set properly; 3) Not enough thickener was used—very juicy cherries may need up to ⅓ cup cornstarch. If your pie is still runny despite adequate baking and cooling, serve it in bowls with a spoon and enjoy it as a rustic dessert!