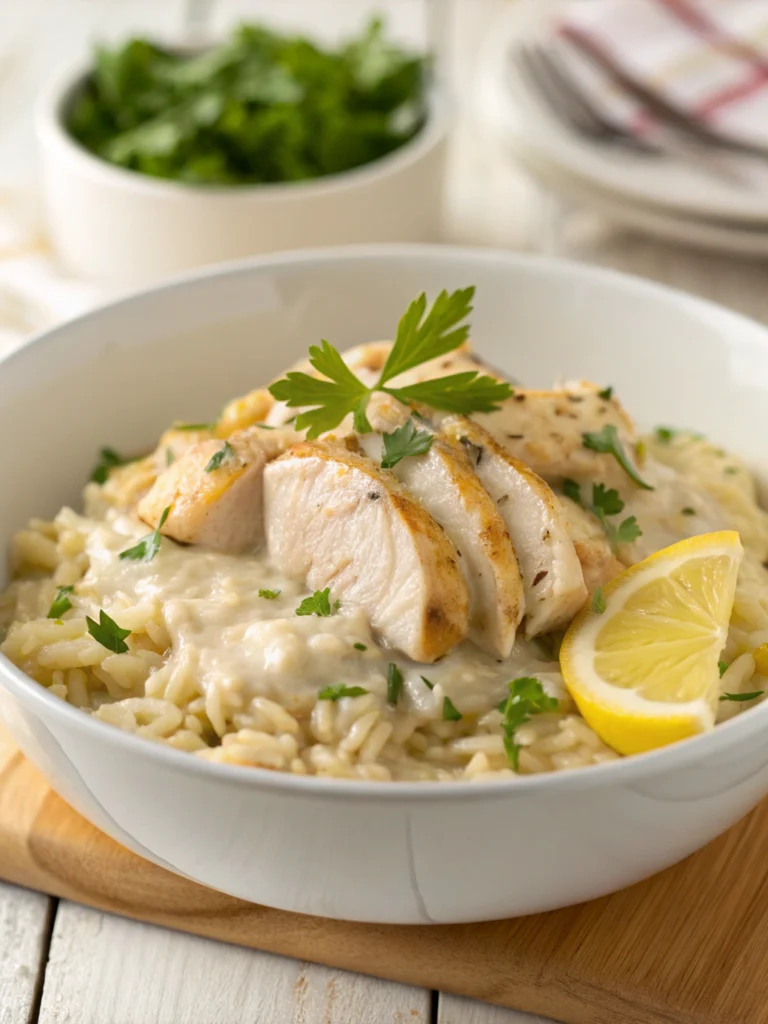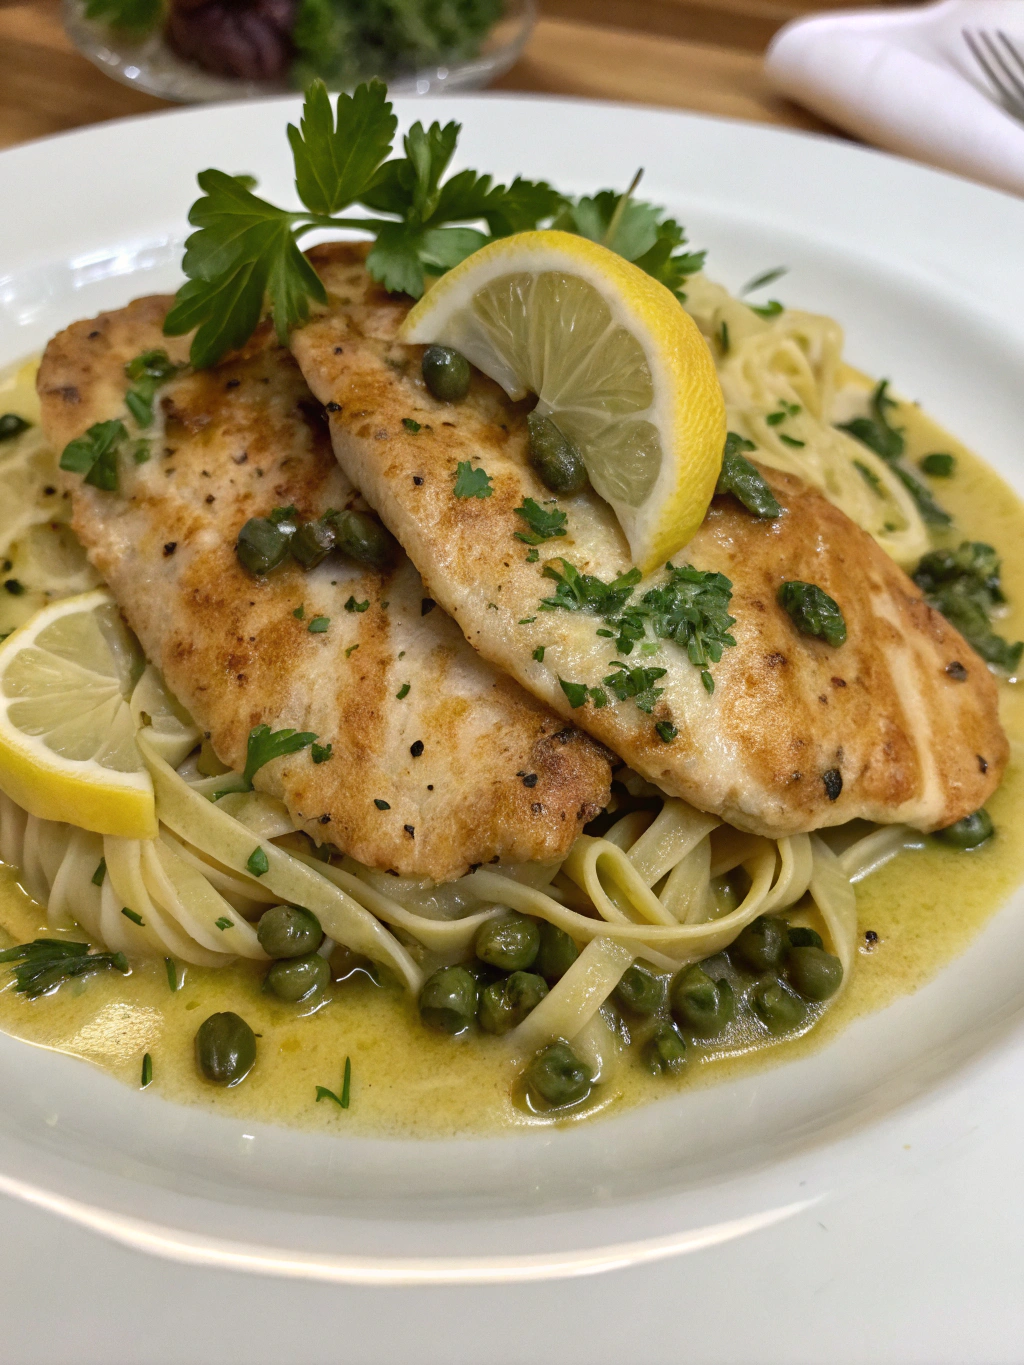
Chicken Piccata
A restaurant-quality Italian dish made simple for your home kitchen. Tender chicken cutlets dredged in flour, pan-fried until golden, and served in a bright lemon-caper sauce that perfectly balances tangy and savory flavors. This Chicken Piccata recipe comes together in just 30 minutes for an impressive weeknight dinner.
Easy Chicken Piccata Recipe
There’s something magical about Chicken Piccata that transforms ordinary chicken breasts into an elegant meal with minimal effort. This classic Italian-American dish celebrates the perfect balance of bright lemon, briny capers, and rich butter in a sauce that feels luxurious spooned over perfectly cooked chicken cutlets. While many associate Chicken Piccata with fancy restaurants, this homemade version brings that same sophisticated flavor to your dinner table with surprisingly simple techniques.
Traditionally enjoyed year-round in Italian cuisine, Chicken Piccata makes an especially welcome appearance during spring and summer when we crave lighter, brighter flavors. The dish traces back to Italy, where “piccata” refers to the technique of pounding meat thin, dredging it in flour, and cooking it in a sauce of lemon, butter, and capers.
THIS RECIPE:
- Ready in just 30 minutes from start to finish
- Uses simple pantry ingredients with big flavor impact
- Creates a restaurant-quality meal with home cooking ease
- Perfect balance of tangy, savory, and buttery flavors
| Recipe Details | Information |
|---|---|
| Prep Time | 15 minutes |
| Cook Time | 15 minutes |
| Total Time | 30 minutes |
| Servings | 4 servings |
| Yield | 4 chicken cutlets with sauce |
Even if you’re new to cooking, this easy Chicken Piccata recipe will guide you through each step to create a dish that looks and tastes impressive. The technique is straightforward, and the flavor payoff is enormous. The bright, lemony sauce with its distinctive caper tang pairs perfectly with the tender chicken cutlets, creating a satisfying meal that feels special enough for company yet simple enough for weeknight cooking.
Ingredients for Chicken Piccata

The magic of Chicken Piccata lies in the quality of its simple ingredients. Each component plays an essential role in creating the dish’s characteristic bright and balanced flavor profile. Since the ingredient list is relatively short, selecting high-quality items will make a noticeable difference in your final dish.
For the Chicken:
- 2 large boneless, skinless chicken breasts (about 1.5 pounds total)
- ½ cup all-purpose flour
- ½ teaspoon kosher salt
- ¼ teaspoon freshly ground black pepper
- 3 tablespoons olive oil
- 2 tablespoons unsalted butter
For the Lemon-Caper Sauce:
- 3 tablespoons unsalted butter, divided
- 1 medium shallot, finely minced (about 3 tablespoons)
- 2 garlic cloves, minced
- ½ cup low-sodium chicken broth
- ⅓ cup fresh lemon juice (from about 2 lemons)
- ¼ cup capers, drained
- 2 tablespoons fresh parsley, chopped
- Lemon slices for garnish (optional)
When shopping for Chicken Piccata ingredients, pay special attention to the chicken, lemons, and capers, as these form the foundation of the dish. Select plump chicken breasts that feel firm to the touch. For lemons, choose ones that feel heavy for their size and have thin, bright yellow skins—these will yield the most juice with the best flavor.
| Ingredient Category | Recommended Quantity | Quality Tips |
|---|---|---|
| Chicken | 1.5 pounds (2 large breasts) | Choose organic or free-range when possible; ensure breasts are similar in size for even cooking |
| Lemons | 2-3 medium lemons | Look for bright yellow, thin-skinned fruits that feel heavy for their size; Meyer lemons add extra sweetness when in season |
| Capers | ¼ cup | Select brined capers (not salt-packed) for convenience; drain well before using |
| Butter | 5 tablespoons total | European-style butter with higher fat content adds richer flavor |
| Chicken Broth | ½ cup | Low-sodium allows better control of final dish’s saltiness; homemade stock elevates flavor |
How to Make Chicken Piccata
Making Chicken Piccata involves a few key techniques—butterflying and pounding chicken, dredging it in seasoned flour, and creating a pan sauce that brings everything together. The process moves quickly once you begin cooking, so having all ingredients prepped and ready is essential.
Prepare the chicken breasts:
- Place each chicken breast on a cutting board and, with your hand flat on top, carefully slice horizontally through the middle to create two thinner pieces.
- Place the chicken pieces between two sheets of plastic wrap and gently pound with a meat mallet or heavy skillet until approximately ¼-inch thick throughout.
- Pat the chicken dry with paper towels. This ensures proper browning when cooking.
Season and dredge:
- In a shallow dish, combine the flour, salt, and pepper.
- Dredge each piece of chicken in the flour mixture, shaking off any excess. A light coating is all you need.
Cook the chicken:
- Heat olive oil and 2 tablespoons butter in a large skillet over medium-high heat until the butter is melted and the mixture is shimmering.
- Working in batches if necessary, add chicken to the pan without crowding.
- Cook for 3-4 minutes per side until golden brown and cooked through (internal temperature of 165°F).
- Transfer cooked chicken to a plate and tent loosely with foil to keep warm.
Make the lemon-caper sauce:
- In the same pan, reduce heat to medium and add 1 tablespoon butter and minced shallot.
- Sauté shallot for 2 minutes until softened but not browned.
- Add garlic and cook for 30 seconds until fragrant.
- Pour in chicken broth and lemon juice, stirring to scrape up any browned bits from the pan bottom.
- Bring to a simmer and cook for 2-3 minutes until slightly reduced.
- Add capers and stir to incorporate.
Finish the dish:
- Reduce heat to low and add remaining 2 tablespoons butter, swirling the pan until butter is melted and sauce is slightly thickened.
- Return chicken to the pan, spooning sauce over the top.
- Warm for 1-2 minutes, then remove from heat.
- Sprinkle with fresh parsley before serving.
Allow the completed dish to rest for 2-3 minutes before serving. This brief resting period lets the flavors meld and the sauce slightly thicken to the perfect consistency.
Tips for Making Chicken Piccata
Pro tip: The key to perfect Chicken Piccata lies in the thickness of your chicken cutlets. Aim for ¼-inch thickness throughout for the most tender results and quickest cooking time.
When preparing homemade Chicken Piccata, these expert insights will help you achieve restaurant-quality results:
- Thoroughly pat chicken dry before dredging to promote better browning and prevent sticking
- Use a heavy-bottomed skillet (stainless steel or cast iron) for more even heat distribution
- Don’t overcrowd the pan when cooking chicken—this ensures proper browning rather than steaming
- Monitor heat carefully—reduce if butter begins to brown too quickly or smoke
| Technique | Recommendation | Why It Matters |
|---|---|---|
| Chicken Pounding | Use gentle, even pressure | Prevents tears in meat while ensuring even thickness for consistent cooking |
| Flour Dredging | Light coating only, shake off excess | Creates delicate crust without becoming gummy; excess flour burns in pan |
| Pan Temperature | Medium-high for chicken, reduced for sauce | Proper heat develops golden crust on chicken but prevents burning delicate sauce ingredients |
| Sauce Consistency | Slightly thickened but still pourable | Should coat back of spoon but remain thin enough to spoon over chicken |
When making the sauce, resist the temptation to rush the reduction process. The few extra minutes allow the flavors to concentrate properly. If your sauce becomes too thick, you can thin it with a tablespoon of chicken broth or water. Conversely, if it’s too thin, continue simmering for another minute or two until it reaches the desired consistency.
Make-Ahead Instructions
Chicken Piccata is best enjoyed fresh, but several components can be prepared ahead of time to streamline cooking:
You can butterfly and pound the chicken breasts up to 24 hours in advance. Store them in an airtight container with pieces of parchment between layers to prevent sticking. Keep refrigerated until ready to use.
The flour mixture can be prepared and stored in a sealed container at room temperature for up to one week. This makes the dredging process quicker when you’re ready to cook.
For partially completed dishes, you can cook the chicken fully, then make the sauce separately, storing both components in the refrigerator for up to 2 days. When ready to serve, gently reheat the chicken in a 300°F oven for 10 minutes while warming the sauce in a skillet. Combine just before serving for the freshest flavor.
If preparing for a dinner party, complete all prep work (cutting, pounding, measuring ingredients) earlier in the day, then cook just before serving for the best texture and flavor profile.
Storing Leftovers
Properly stored, leftover Chicken Piccata will maintain its quality for 3-4 days in the refrigerator. To store:
Allow the dish to cool completely to room temperature (but not longer than 2 hours after cooking) before transferring to storage containers. Use shallow, airtight containers that will allow the chicken to be stored in a single layer with sauce poured over the top.
For best food safety practices, refrigerate promptly at 40°F or below. The acidic nature of the lemon sauce helps preserve the chicken, but proper refrigeration is still essential.
When reheating, warm gently to avoid overcooking the already tender chicken. For best results, reheat in a covered skillet over low heat with a tablespoon of chicken broth added to refresh the sauce. Microwave reheating works in a pinch—cover the dish and use medium power (70%) in 30-second increments until warmed through.
The lemon-caper sauce may thicken significantly when chilled. When reheating, you may need to add 1-2 tablespoons of chicken broth or water to restore its original consistency.
Freezing Chicken Piccata
While fresh is best for this dish, Chicken Piccata can be frozen if necessary. The sauce may separate slightly upon thawing, but gentle reheating can help reunite the components.
To freeze properly:
- Cool the cooked chicken and sauce completely.
- Place chicken pieces in a single layer on a parchment-lined baking sheet and freeze until solid (about 2 hours).
- Transfer frozen chicken to a freezer-safe container or heavy-duty freezer bag.
- Pour sauce into a separate freezer container, leaving ½-inch headspace for expansion.
- Seal, label with contents and date, and freeze.
Properly stored, frozen Chicken Piccata will maintain best quality for about 2-3 months. After this time, it remains safe to eat but quality may decline.
To thaw and reheat:
- Thaw both chicken and sauce overnight in the refrigerator.
- Gently reheat chicken in a 300°F oven for about 15 minutes.
- Meanwhile, warm the sauce in a skillet over low heat, whisking to recombine if separated.
- Pour warmed sauce over chicken just before serving.
Serving Suggestions
Chicken Piccata pairs beautifully with a variety of sides that complement its bright, tangy flavors. For a complete meal that balances the dish’s acidity and richness, consider these accompaniments:
Starchy Sides:
- Angel hair pasta tossed with olive oil and a touch of parsley
- Creamy mashed potatoes to absorb the delicious sauce
- Buttery polenta for an authentic Italian pairing
- Crusty Italian bread for sauce-sopping duties
Vegetable Pairings:
- Roasted asparagus with lemon zest
- Sautéed spinach with garlic
- Steamed broccolini with olive oil and sea salt
- Simple arugula salad with shaved parmesan and lemon vinaigrette
For an elegant presentation, serve each chicken cutlet on a warmed plate, slightly overlapping if needed. Spoon the sauce generously over the chicken, ensuring each piece is well-coated. Garnish with a sprinkle of fresh parsley and thin lemon slices or a twist of lemon peel.
Beverage pairings should complement the bright, acidic nature of the dish. A crisp Pinot Grigio or unoaked Chardonnay makes an excellent wine pairing. For non-alcoholic options, sparkling water with a splash of lemon or a light iced tea works beautifully.
Serve Chicken Piccata hot, as soon as it’s ready. The dish is at its prime when the chicken is tender and the sauce is warm and emulsified.
FAQ
Can I use chicken thighs instead of breasts for Chicken Piccata?
Yes, boneless, skinless chicken thighs can be substituted. They won’t need to be butterflied but should still be pounded to an even thickness. Thighs may require an additional 1-2 minutes of cooking time per side and offer a more flavorful, moist result than breasts.
What can I substitute for capers if I don’t have any?
While capers provide a distinctive flavor, you can substitute finely chopped green olives for a similar briny note. In a pinch, a teaspoon of rinsed and chopped pickled jalapeños or a half teaspoon of lemon zest with a pinch of salt can approximate some of the caper flavor profile, though the dish will taste noticeably different.
How can I make Chicken Piccata if I’m avoiding alcohol?
Traditional Chicken Piccata doesn’t require wine, using chicken broth as the base for the sauce. If your concern is about cooking wine that might be called for in some recipes, simply use additional chicken broth with perhaps a small splash of white wine vinegar for acidity.
My sauce broke and looks separated. How can I fix it?
A broken sauce can be rescued! Remove from heat immediately and add 1-2 teaspoons of cold water. Whisk vigorously off the heat until it comes back together. Alternatively, you can whisk in an additional small piece of cold butter to help re-emulsify the sauce.
Can I make Chicken Piccata gluten-free?
Absolutely! Simply substitute the all-purpose flour with a gluten-free flour blend, rice flour, or even finely ground almond flour. Be sure to check that your chicken broth is also gluten-free, as some commercial brands may contain gluten additives.