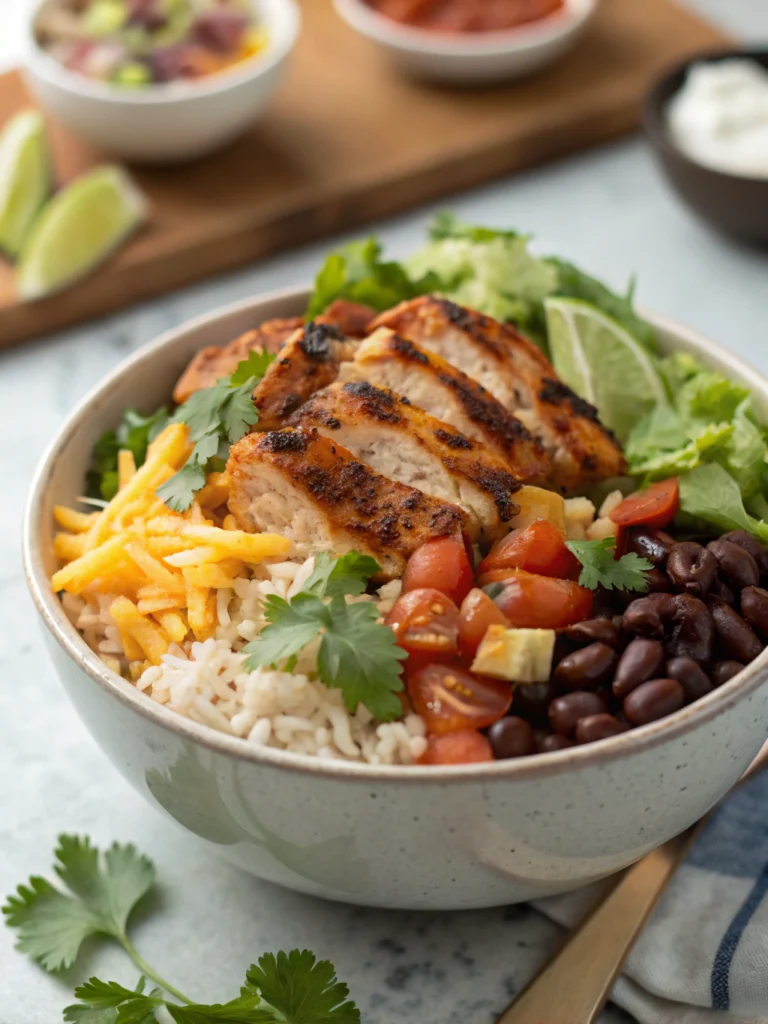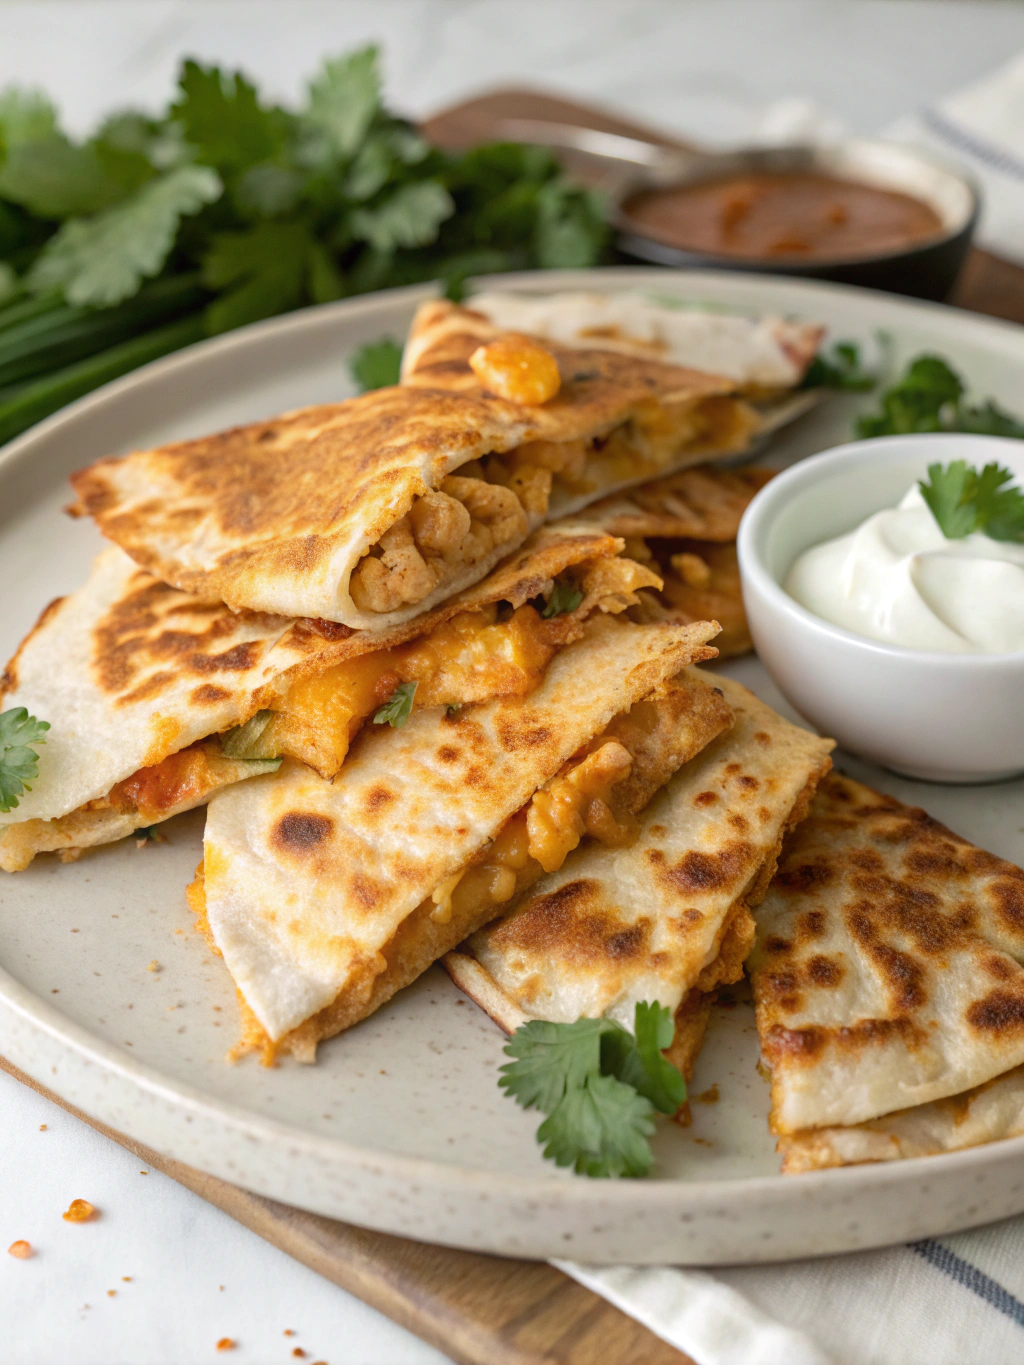
Chicken Quesadillas
A perfectly crispy tortilla filled with juicy seasoned chicken, melted cheese, and fresh vegetables that come together in just 20 minutes for a quick weeknight dinner or crowd-pleasing appetizer.
Easy Chicken Quesadillas Recipe
There’s something magical about that first bite of a perfectly cooked chicken quesadilla—the satisfying crunch of the golden tortilla giving way to gooey, melted cheese and tender, seasoned chicken. This staple of Mexican cuisine has found its way onto dinner tables across America, and for good reason. It’s the ultimate comfort food that’s both simple to prepare and endlessly customizable.
While quesadillas have ancient roots in Mexican culinary tradition dating back to the 16th century, they’ve evolved into a beloved dish that bridges cultures and brings families together around the table. Perfect for busy weeknights or as a crowd-pleasing appetizer during game day gatherings, these homemade chicken quesadillas deliver restaurant-quality flavor with pantry-friendly ingredients.
THIS RECIPE:
- Ready in just 20 minutes from start to finish
- Uses simple pantry ingredients with fresh elements
- Perfect for using leftover rotisserie or grilled chicken
- Customizable with your favorite toppings and fillings
| Recipe Details | Information |
|---|---|
| Prep Time | 10 minutes |
| Cook Time | 10 minutes |
| Total Time | 20 minutes |
| Servings | 4 quesadillas |
| Yield | 8 wedges |
| Calories | 425 per serving |
These easy chicken quesadillas strike the perfect balance between simplicity and flavor. With just a few minutes of prep and cooking, you’ll have a meal that satisfies both picky eaters and food enthusiasts alike. The combination of tender chicken, melted cheese, and crispy tortillas creates a textural experience that keeps you coming back for more, while the customizable nature of quesadillas means you can easily adapt them to suit your family’s preferences or what you have on hand.
Ingredients for Chicken Quesadillas

The secret to truly exceptional chicken quesadillas lies in the quality of your ingredients. While this recipe is forgiving and adaptable, using fresh components whenever possible will elevate the final result from good to memorable. The balance of flavors—from the seasoned chicken to the melty cheese and fresh vegetables—creates a harmonious blend that makes these quesadillas irresistible.
Main Ingredients:
- 2 cups cooked chicken breast, shredded or diced
- 4 large (10-inch) flour tortillas
- 2 cups Mexican-blend shredded cheese (or combination of Monterey Jack and cheddar)
- 1 tablespoon olive oil
- 1 medium red bell pepper, finely diced
- 1 small red onion, finely diced
- 1 jalapeño, seeds removed and minced (optional)
- 2 cloves garlic, minced
- 1 tablespoon taco seasoning
- 2 tablespoons fresh cilantro, chopped
- 1 lime, cut into wedges for serving
For Serving (Optional):
- 1 cup fresh pico de gallo
- 1 avocado, sliced or made into guacamole
- ½ cup sour cream
- ¼ cup sliced green onions
- Hot sauce to taste
| Ingredient Category | Recommended Quantity | Quality Tips |
|---|---|---|
| Chicken | 2 cups cooked | Rotisserie chicken provides excellent flavor and moisture; if cooking from raw, season well with salt, pepper, and garlic powder |
| Tortillas | 4 large flour tortillas | Look for “burrito size” tortillas; fresher tortillas fold without cracking |
| Cheese | 2 cups shredded | Buy blocks and shred yourself for better melting (pre-shredded contains anti-caking agents) |
| Vegetables | 1 bell pepper, 1 onion | Choose firm vegetables with bright colors; dice uniformly for even cooking |
| Seasonings | 1 tbsp taco seasoning | Make your own blend for fresher flavor and lower sodium |
Pro tip: If using leftover chicken, consider adding a tablespoon of chicken broth or lime juice to refresh the meat and add moisture before seasoning.
How to Make Chicken Quesadillas
Creating the perfect chicken quesadilla involves a balance between proper ingredient preparation and the right cooking technique. The key is achieving that golden, crispy exterior while ensuring the interior components are heated through and the cheese is perfectly melted. Follow these steps for quesadilla success every time.
Prepare the chicken filling:
- Heat olive oil in a large skillet over medium heat.
- Add diced onions and sauté for 2-3 minutes until they begin to soften.
- Add bell peppers, jalapeño (if using), and garlic, cooking for another 2 minutes until fragrant.
- Stir in the cooked chicken and taco seasoning, mixing thoroughly to coat.
- Cook for 2 minutes until everything is warmed through and well combined.
- Remove from heat and stir in chopped cilantro.
- Transfer mixture to a bowl and clean the skillet for cooking quesadillas.
Assemble the quesadillas:
- Lay a tortilla flat on a clean work surface.
- Sprinkle ½ cup of shredded cheese evenly over half of the tortilla.
- Spread approximately ½ cup of the chicken mixture over the cheese.
- Add another ¼ cup of cheese on top of the chicken mixture (this ensures proper melting and helps the quesadilla hold together).
- Fold the empty half of the tortilla over the filling to create a half-moon shape.
- Press down lightly to slightly flatten the quesadilla.
Cook the quesadillas:
- Heat the cleaned skillet over medium heat.
- Lightly coat with cooking spray or a small amount of butter.
- Carefully transfer the assembled quesadilla to the skillet.
- Cook for 2-3 minutes on the first side until golden brown and crispy.
- Using a large spatula, carefully flip the quesadilla and cook for another 2 minutes until the second side is golden brown and the cheese is completely melted.
- Remove to a cutting board and let rest for 1 minute before cutting.
Repeat and serve:
- Repeat the process with remaining ingredients for all four quesadillas.
- Cut each quesadilla into 2-3 wedges using a pizza cutter or sharp knife.
- Serve immediately with lime wedges and optional toppings.
Pro tip: For an extra crispy exterior, brush the outside of the tortillas with a light coating of melted butter before cooking.
Tips for Making Chicken Quesadillas
Master the art of the perfect chicken quesadilla with these expert insights that will take your creation from good to exceptional. Little adjustments in technique and ingredients can make a significant difference in the final result.
- Don’t overfill your quesadillas – too much filling makes them difficult to flip and can result in ingredients spilling out
- Use moderately low heat to ensure the tortilla doesn’t burn before the cheese melts
- Always add a layer of cheese first against the tortilla to act as “glue” for the other ingredients
- Let the quesadillas rest briefly after cooking to allow the cheese to set slightly for easier cutting
| Technique | Recommendation | Why It Works |
|---|---|---|
| Tortilla Selection | Use flour tortillas for beginners | They’re more pliable and less likely to crack than corn tortillas |
| Cheese Application | Create two layers of cheese (below and above fillings) | Ensures everything sticks together and distributes melted cheese throughout |
| Heat Management | Medium-low heat | Allows cheese to melt completely while tortilla browns gradually |
| Flipping Method | Use a wide spatula and confident, quick motion | Prevents filling spillage and maintains the quesadilla’s shape |
For the filling, cooking the vegetables briefly before adding them to the quesadilla ensures they’ll be perfectly tender, not raw or watery. This pre-cooking also allows their flavors to meld with the chicken and seasonings.
When it comes to the chicken itself, slightly moister chicken works better in quesadillas. If your chicken seems dry, add a tablespoon of broth or even a small amount of salsa to the mixture before filling. The added moisture will create steam inside the quesadilla, helping to melt the cheese more effectively.
Make-Ahead Instructions
Busy weeknights call for smart planning, and these chicken quesadillas are perfect for make-ahead preparation. By breaking down the process into components, you can have delicious quesadillas ready in minutes when hunger strikes.
The chicken filling mixture can be prepared up to 3 days in advance and stored in an airtight container in the refrigerator. This actually allows the flavors to develop more fully, resulting in an even more flavorful quesadilla. When ready to use, simply reheat the filling in a microwave or skillet until warmed through before assembling your quesadillas.
For ultimate convenience, you can assemble entire quesadillas up to 24 hours ahead of time. Layer them between sheets of parchment paper and store in a large ziplock bag or container in the refrigerator. When ready to cook, allow them to come to room temperature for about 15 minutes before placing them in the skillet for best results.
If you’re planning a party or large gathering, consider a quesadilla bar approach. Prepare all components separately and allow guests to assemble their own with their preferred ingredients. Keep the chicken filling warm in a slow cooker set to low, with tortillas wrapped in foil in a low oven, and cheeses and toppings in serving dishes for a fun, interactive meal.
Storing Leftovers
Properly stored leftovers mean you can enjoy these delicious chicken quesadillas for several days after making them. Following food safety guidelines ensures they remain not only safe to eat but maintain their flavor and texture as much as possible.
For cooked quesadillas, allow them to cool completely before storing to prevent condensation which can make the tortillas soggy. Once cooled, wrap individual quesadillas in aluminum foil or place in airtight containers with parchment paper between layers. Properly stored, cooked quesadillas will last 3-4 days in the refrigerator.
The uncooked chicken filling can be stored separately in an airtight container in the refrigerator for up to 4 days, allowing you to make fresh quesadillas as needed throughout the week.
For reheating, the best results come from using a dry skillet over medium-low heat for 2-3 minutes per side, which restores the crispy exterior. While microwaving is quicker (30-45 seconds per quesadilla), the tortillas will lose their crispness. If using a microwave, place a paper towel under the quesadilla to absorb excess moisture.
Pro tip: For the freshest taste when enjoying leftovers, add a sprinkle of fresh cilantro and a squeeze of lime after reheating.
Freezing Chicken Quesadillas
Freezing chicken quesadillas is an excellent way to prepare quick meals for busy days or unexpected guests. With the right technique, they’ll retain most of their flavor and texture when reheated.
For best results, freeze quesadillas before the final cooking stage. Assemble quesadillas as directed, then place them on a parchment-lined baking sheet in a single layer. Freeze until solid (about 2 hours), then wrap each quesadilla individually in plastic wrap followed by aluminum foil or place in freezer-safe ziplock bags with parchment paper between them. Label with the date and freeze for up to 3 months.
When ready to enjoy, you have two options for cooking frozen quesadillas:
No need to thaw: Place the frozen quesadilla in a skillet over medium-low heat. Cover with a lid for 2-3 minutes to help the ingredients warm through, then uncover and continue cooking until the tortilla is crispy and the filling is hot, flipping halfway through (about 3-4 minutes per side).
Thaw first method: For a quicker cooking time, thaw quesadillas in the refrigerator overnight, then cook as you would fresh quesadillas, about 2-3 minutes per side until golden and crispy.
The texture of the vegetables may change slightly after freezing, becoming a bit softer, but the overall flavor profile remains delicious. For the best balance between convenience and quality, consider freezing just the chicken filling and assembling fresh quesadillas when needed.
Serving Suggestions
Transform your chicken quesadillas from a simple meal into a festive spread with these complementary serving ideas. The versatility of quesadillas means they pair beautifully with a variety of sides and toppings.
Traditional accompaniments that perfectly complement the flavors of chicken quesadillas include:
- Fresh pico de gallo or your favorite salsa (try varying heat levels for different experiences)
- Creamy guacamole or sliced avocado
- Tangy sour cream or Mexican crema
- Chopped fresh cilantro and lime wedges for brightness
- Pickled red onions or jalapeños for a pop of acidity and color
For a complete meal, consider these side dishes:
- Mexican-style rice with corn and black beans
- Light green salad with cilantro-lime dressing
- Elote (Mexican street corn) with cotija cheese
- Refried beans topped with crumbled queso fresco
Beverage pairings elevate the entire dining experience:
- Classic margaritas or Mexican beer with lime
- Horchata for a non-alcoholic option
- Sparkling water with fresh lime and mint
- For wine enthusiasts, a crisp Sauvignon Blanc or light Pinot Noir
For maximum flavor and textural contrast, serve quesadillas immediately after cooking while they’re still crispy on the outside and melty inside. Arrange quesadilla wedges on a platter with small bowls of various toppings for a casual, customizable dining experience that encourages interaction and enjoyment.
FAQ
Can I use corn tortillas instead of flour tortillas for chicken quesadillas?
Yes, you can use corn tortillas for a more authentic flavor and gluten-free option. However, corn tortillas are less pliable and may crack when folded. For best results with corn tortillas: choose slightly larger sizes (6-inch minimum), warm them briefly in a dry skillet or microwave to increase flexibility before filling, and be especially careful when flipping them during cooking. Corn tortillas also typically require less cooking time than flour tortillas.
What’s the best cheese to use for chicken quesadillas?
The ideal cheese for quesadillas melts easily while providing good flavor. Traditional options include Oaxaca cheese (similar to mozzarella) or queso asadero. For widely available options, a combination of monterey jack and mild cheddar offers perfect meltability with flavor. Avoid using only cheddar as it can separate when melted and become greasy. Pre-shredded cheese works in a pinch, but freshly shredded cheese melts more smoothly because it doesn’t contain anti-caking agents.
Can I make chicken quesadillas without a skillet?
Absolutely! While a skillet provides the most control over cooking temperature, you have several alternatives:
- Quesadilla maker: If you have this specialized appliance, it creates perfectly sealed edges
- Panini press: Works wonderfully for creating crispy quesadillas with pronounced grill marks
- Oven method: Preheat to 425°F, place assembled quesadillas on a baking sheet, brush with oil, and bake for 8-10 minutes, flipping halfway
- Air fryer: Preheat to 370°F and cook for 5-7 minutes until crispy and golden
- Outdoor grill: Place on medium heat for 2-3 minutes per side for smoky flavor
How can I make my chicken quesadillas healthier?
To create a more nutritious version of chicken quesadillas without sacrificing flavor:
- Use whole wheat tortillas for increased fiber
- Opt for reduced-fat cheese, using less quantity but distributing it evenly
- Load up on vegetables like spinach, mushrooms, and zucchini
- Choose lean chicken breast and consider using less meat while adding black beans for protein
- Use cooking spray rather than butter for the skillet
- Serve with Greek yogurt instead of sour cream
- Add nutritional boosts like finely chopped spinach or shredded carrots to the filling
- Control portion size by cutting into smaller wedges and pairing with vegetables
Why are my quesadillas soggy instead of crispy?
Soggy quesadillas are usually caused by excess moisture or improper cooking technique. To ensure crispy results: pat all fillings dry before adding (especially vegetables); avoid overfilling, which prevents proper heat distribution; use medium-low heat to allow tortillas to crisp gradually; cook uncovered to allow steam to escape; and let the filling cool slightly before assembling to prevent steam buildup. If using particularly wet ingredients like fresh tomatoes, consider cooking them first to release excess moisture.